Explained Everything explained: Magic Ink

Magic Ink is an incredible way to create excitement in the classroom. Using Explain Everything web or Explain Everything Advanced, ActivPanel 9 Whiteboard, Promethean ActivSuite Whiteboard, or even the Explain Everything app on Android and iOS, you can create and conceal layers that magically reveal when you use the Eraser tool to remove the top layer.
With Magic Ink, you can craft exciting activities like interactive reveals, before-and-after comparisons, and layered visuals.
Let’s learn how to bring delightful illusions to life into your lessons.
Lay down the layers
Explain Everything uses layers to build slides within your project. You must set up your layers before using the Eraser tool.
Step 1: Add your base layer
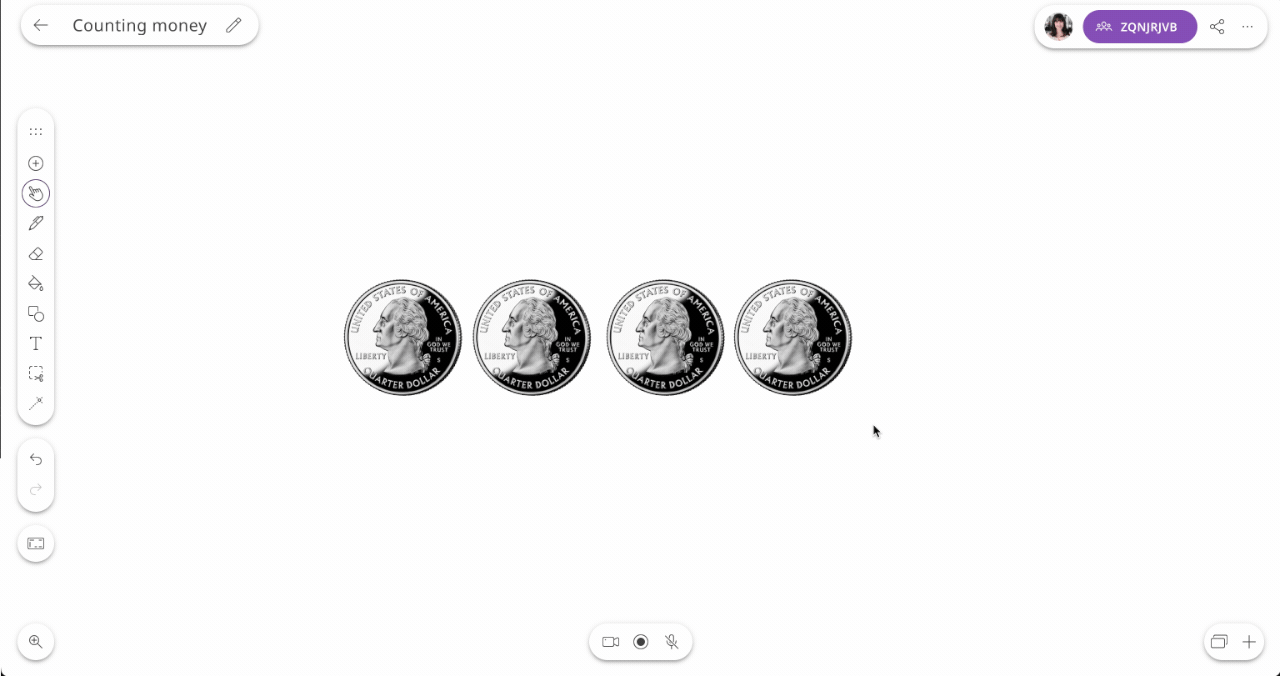
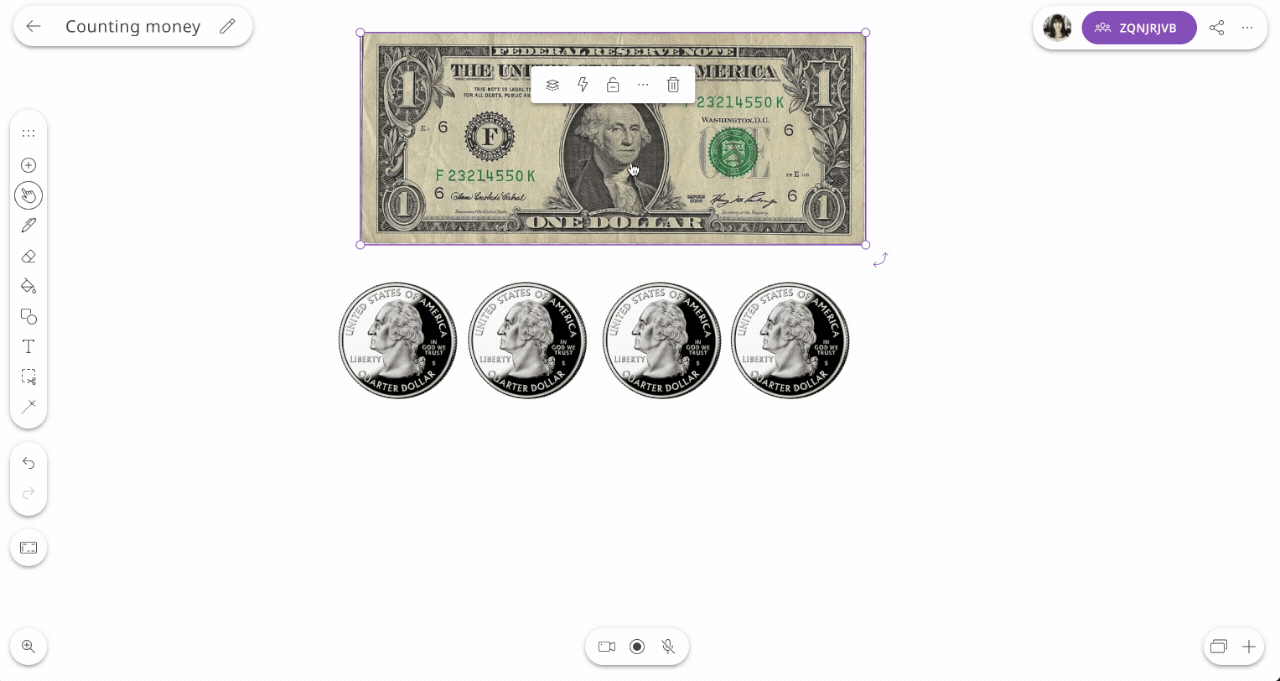
Insert the content you want to reveal. In this example, we are revealing that there are four quarters in a dollar.
If you are using multiple objects in the base layer, it is a good idea to group them by selecting all of them, choosing the Layers and alignment tool in the object menu, and then clicking the Group option.

Step 2: Lock your base layer
Once you have the base layer where you want it, lock it by clicking on the object, choosing Lock in the object menu, and then clicking the Lock option.
Step 3: Add the top layer
Once the base layer setup is complete, add the top layer. This layer will be erased to reveal the bottom layer. Size the object as needed and then move it to completely cover the object you want to hide and reveal during your lesson.
Abracadabra! Make the objects magically appear
It’s time to wave your digital wand to reveal your masterpiece.
Click the Eraser tool. If you are using images, make sure you choose the Erase with images tool.
Now it’s time for the magic! Erase the top layer to reveal the bottom layer. Your students may think you’re up to some hocus pocus, but really, it’s just an enchanting effect.

Add extra sparkle: Cast illusions with these ideas
Now that you have the basics down, here are some ways to charm your students with Magic Ink:
- Math mysteries: Hide parts of a math problem and reveal the answers one by one. Or magically make graphs appear, helping your students visualize complicated equations.
- History hunts: Slowly uncover historical documents or facts. You can also create before-and-after timelines to help students understand the significance of a historical event.
- Science secrets: Peel back layers to uncover the earth’s structure, from crust to inner core. Use Magic Ink to show answers for chemical formulas or reveal parts of the Periodic Table.
- Geography guesswork: Hide country names, capitals, or landmarks for an interactive map quiz. Use Magic Ink to help students understand the cycle of rain.
- Fun and games: Add a dash of excitement with a scratch-off game or a treasure hunt for clues. Play a Jeopardy-like game where students answer questions in categories to help them remember answers for a test.
Magic Ink is not just fun; it turns ordinary lessons into extraordinary experiences. Adding a touch of magic can help students stay engaged and retain even the most complex subjects through visual learning.
Ready to cast your first spell with Explain Everything’s Magic Ink? Start creating your own enchanting lesson with a blank whiteboard or start with a template from our ever-growing library. Get more out of Explain Everything by taking one of our courses or exploring our wide range of resources.