Unlock the power of the ActivPanel 10 Premium accessories

If you’re new to our ActivPanel 10 Premium, you may have noticed two exciting accessories included with the panel: the ActivPen® 2 and the All-in-one Remote*. Both allow you to completely untether from your ActivPanel, letting you teach anywhere in the classroom.
Both accessories come ready to plug-and-play with your ActivPanel. Let’s go over how to quickly connect them to your ActivPanel 10 Premium.
Connecting the ActivPen 2
When you unbox the ActivPen 2, you will see a USB dock and charging cable are included. Once you install the USB dock on your ActivPanel, it will automatically charge and pair your ActivPen 2 to your ActivPanel 10.
To install the USB dock on your ActivPanel 10, simply plug the dock into the designated USB port on the left side of the panel. You may need to remove the silicone cover if it hasn’t been removed already.
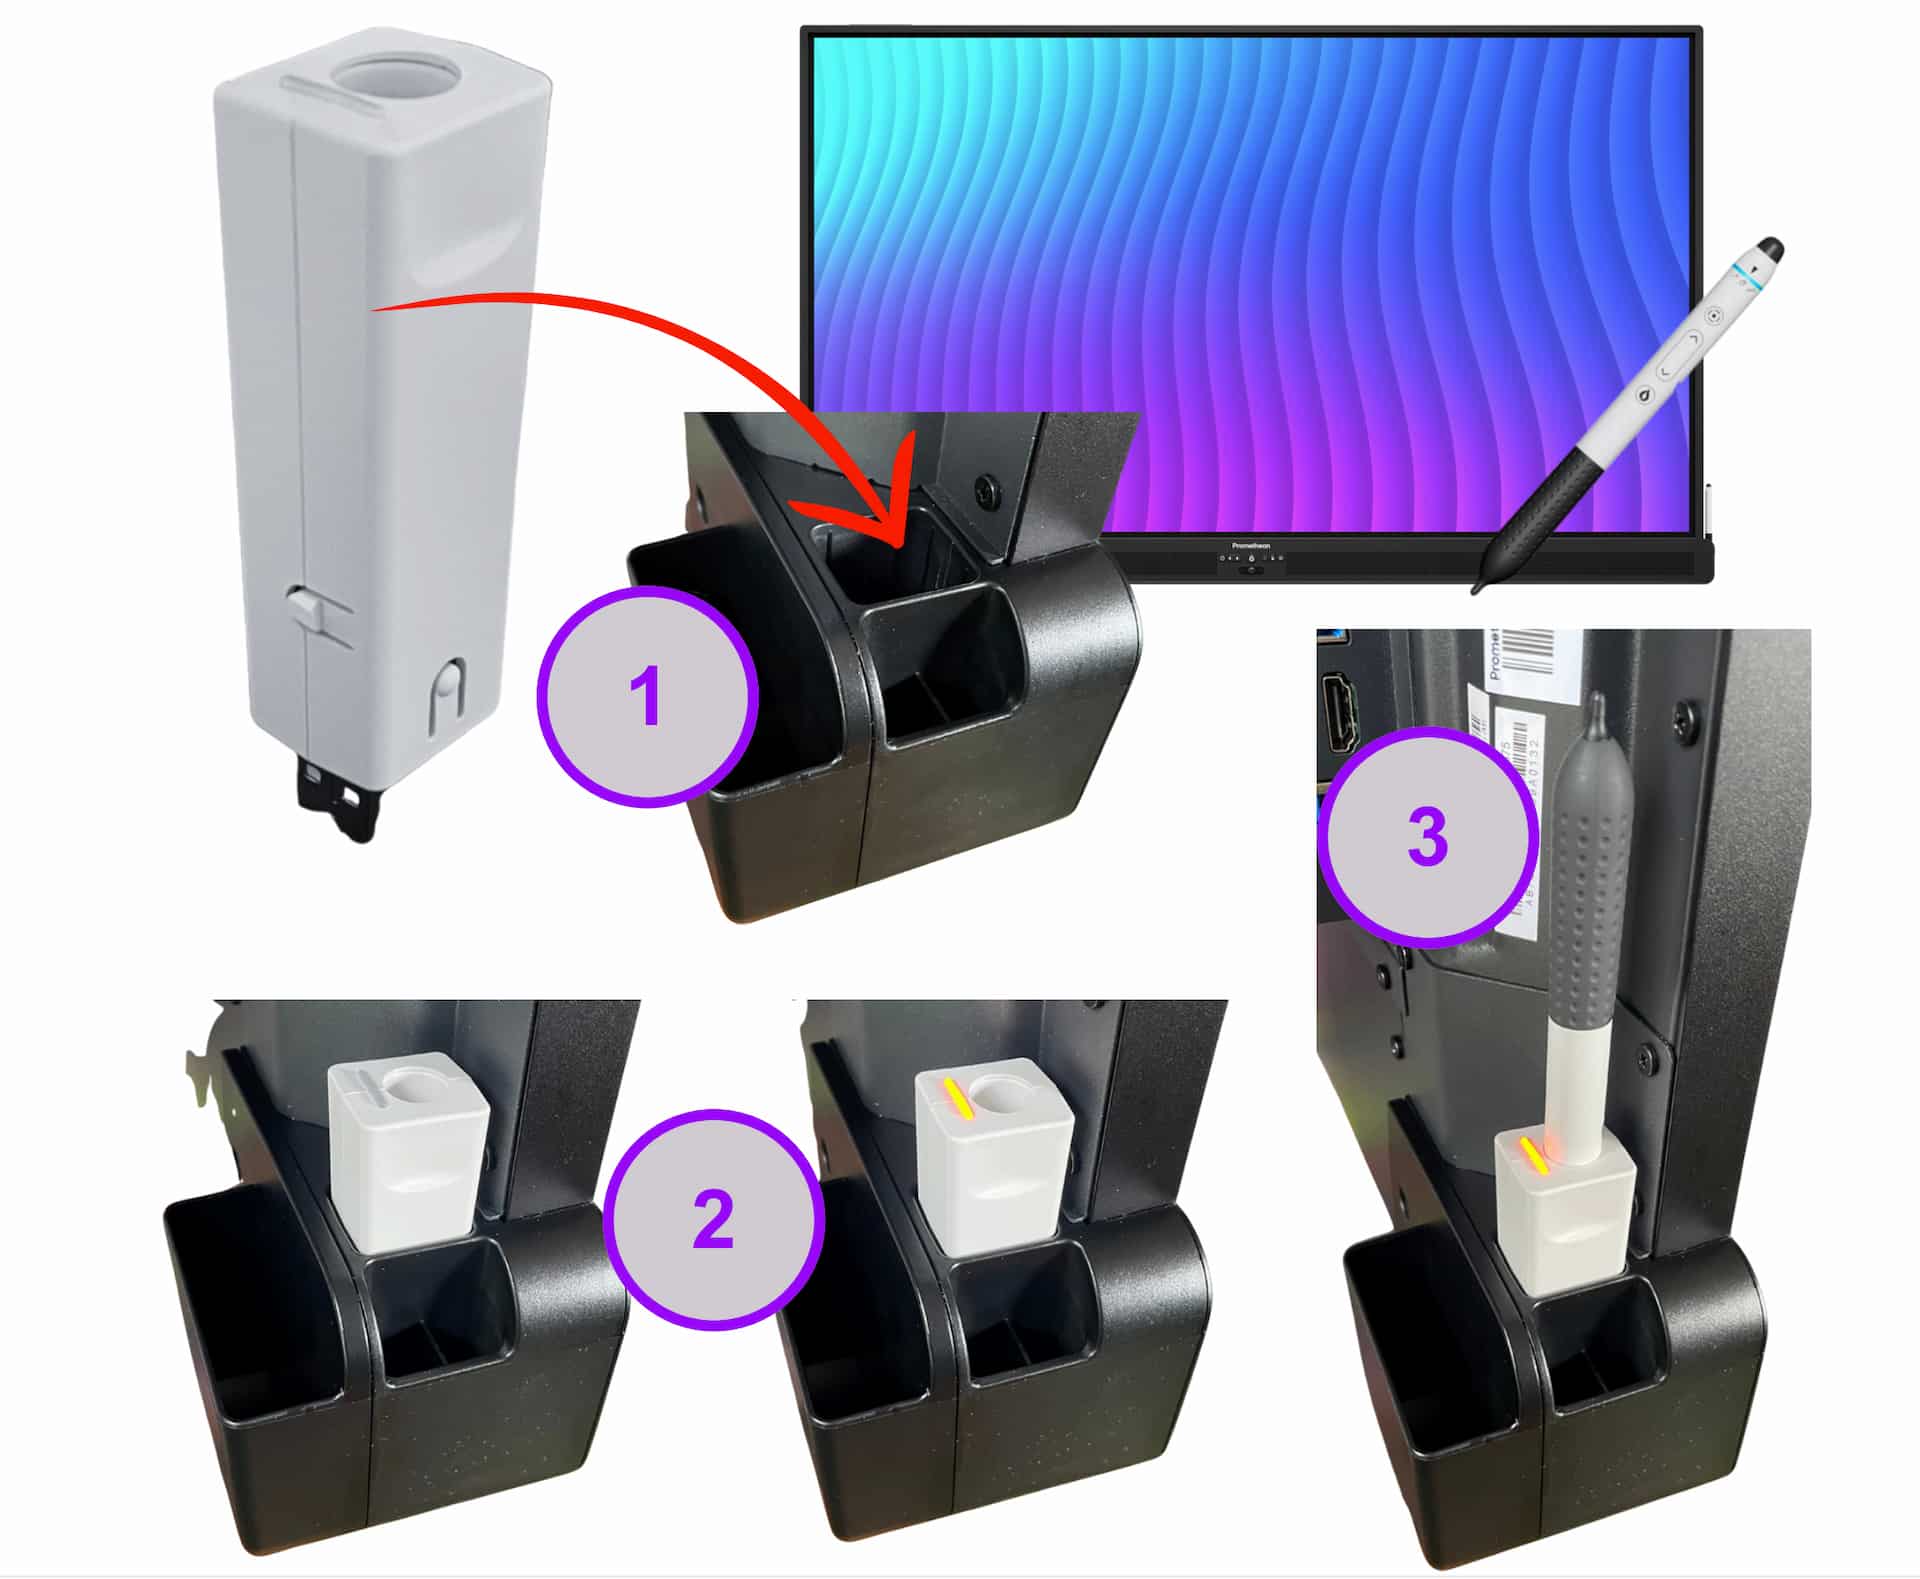
Once you turn your ActivPanel 10 on, a light will illuminate on the dock, showing it’s active and ready to use. Now you’re all set to place the ActivPen 2 into the dock for charging and automatic pairing.
If needed, you can also charge the ActivPen 2 using the charging cable. This is great in scenarios where you want multiple charging places or need to keep the ActivPen 2 stored in a secure location. Please note that the charging cable will not pair the ActivPen 2 to the ActivPanel 10. Please use the dock for initial pairing.
Learn how to charge your ActivPen 2 in this video:

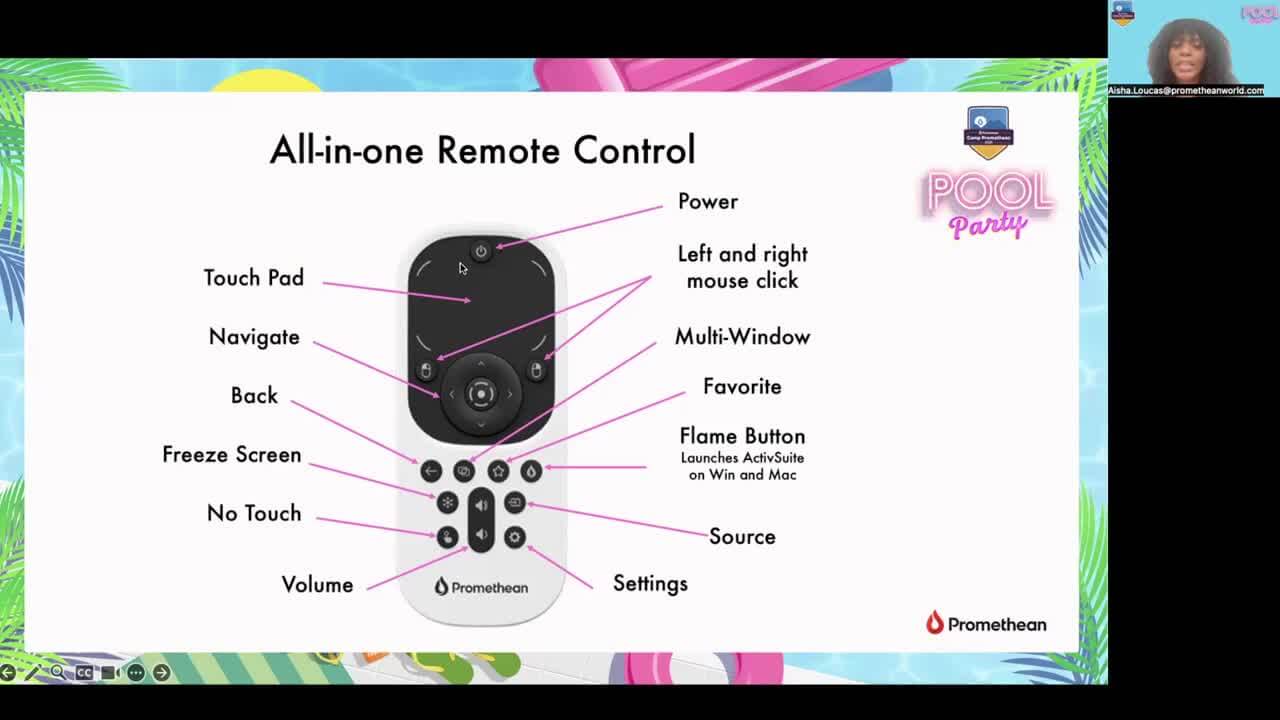
Connecting the All-in-one Remote
Similar to the ActivPen 2, the All-in-one Remote includes both a USB dongle and a charging cable. When you install the USB dongle, it will automatically pair the All-in-one Remote to your ActivPanel 10.
To connect, simply plug the USB dongle into the designated USB port on the top of your ActivPanel 10. You may need to remove the silicone cover first.
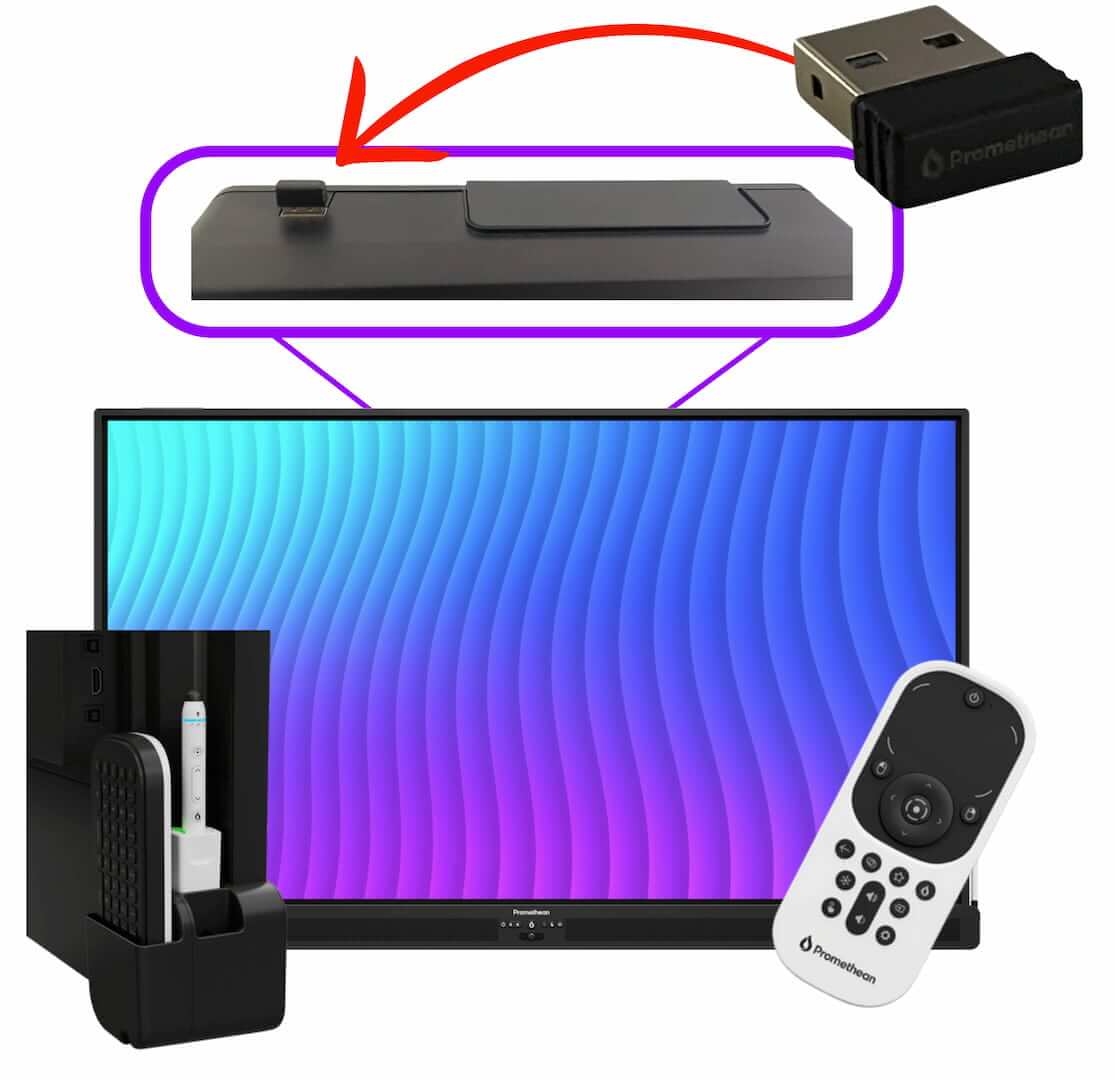
The All-in-one Remote can be charged using the provided USB-C charging cable. To keep everything in one place, you can also charge the All-in-one Remote at the docking station on the left side of the panel. Connect the USB-C charging cable to one of the USB ports on the side of the ActivPanel 10. Your All-in-one Remote is now ready to charge in its designated holder, helping to keep you organized!
Download this guide to print or save the installation steps for later.
When you’re ready to take a deeper dive into ActivPanel 10, take our ActivPanel 10 Essentials 1 course or find curated sources to help you get started in the ActivPanel 10 Learning pack.
*All-in-one Remote availability varies by region.